Webinar: Enhancing User Experience For Online Directories

Enhancing User Experience For Online Directories

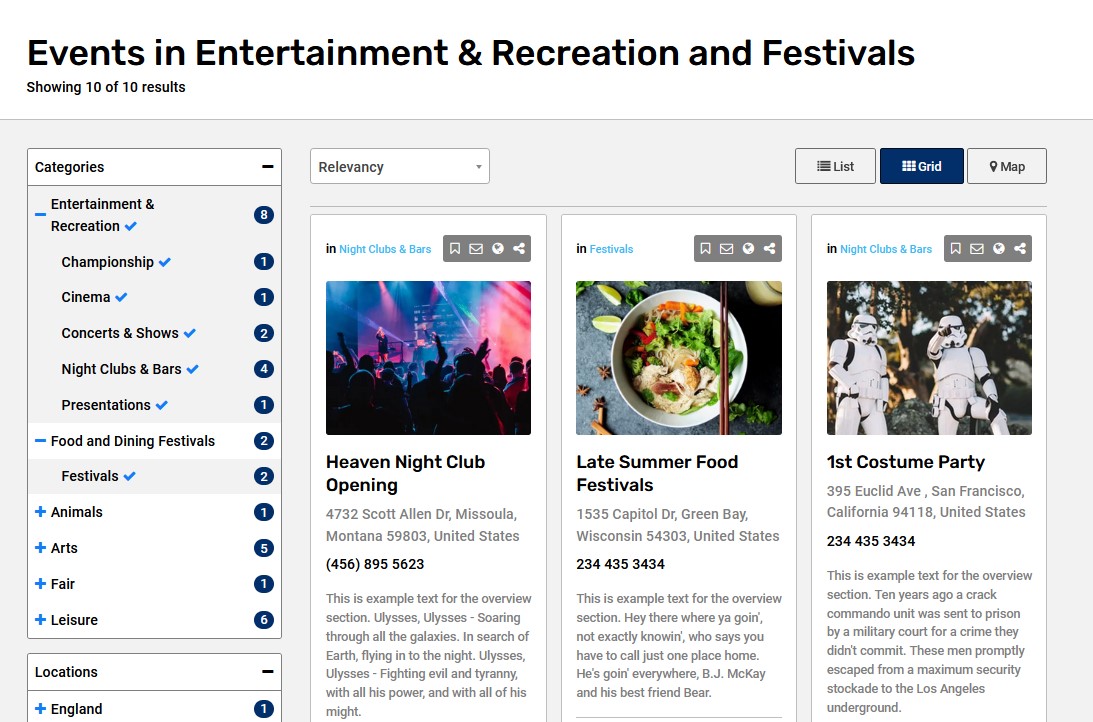
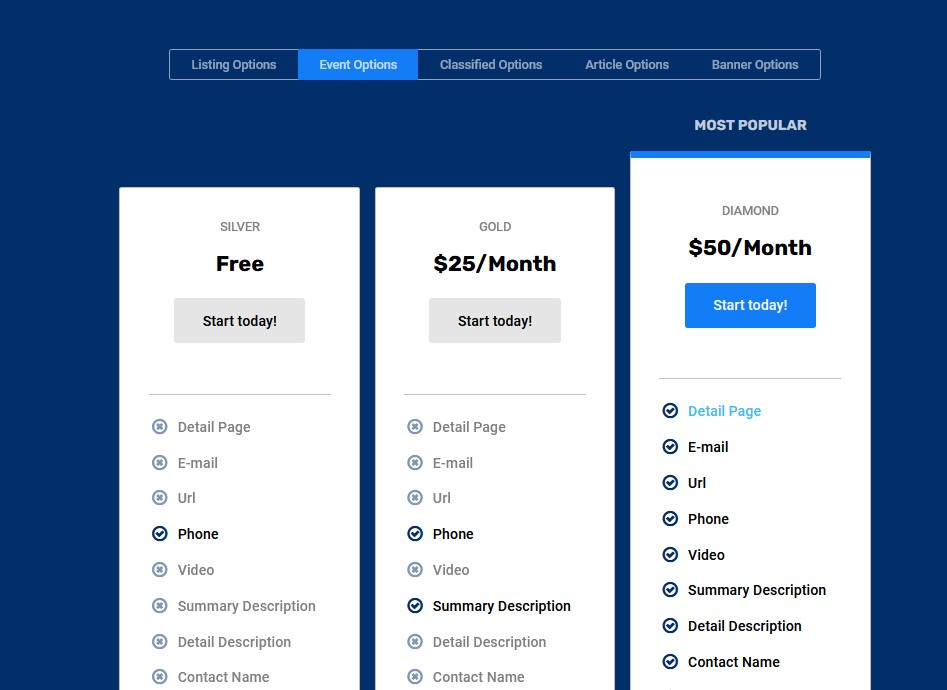
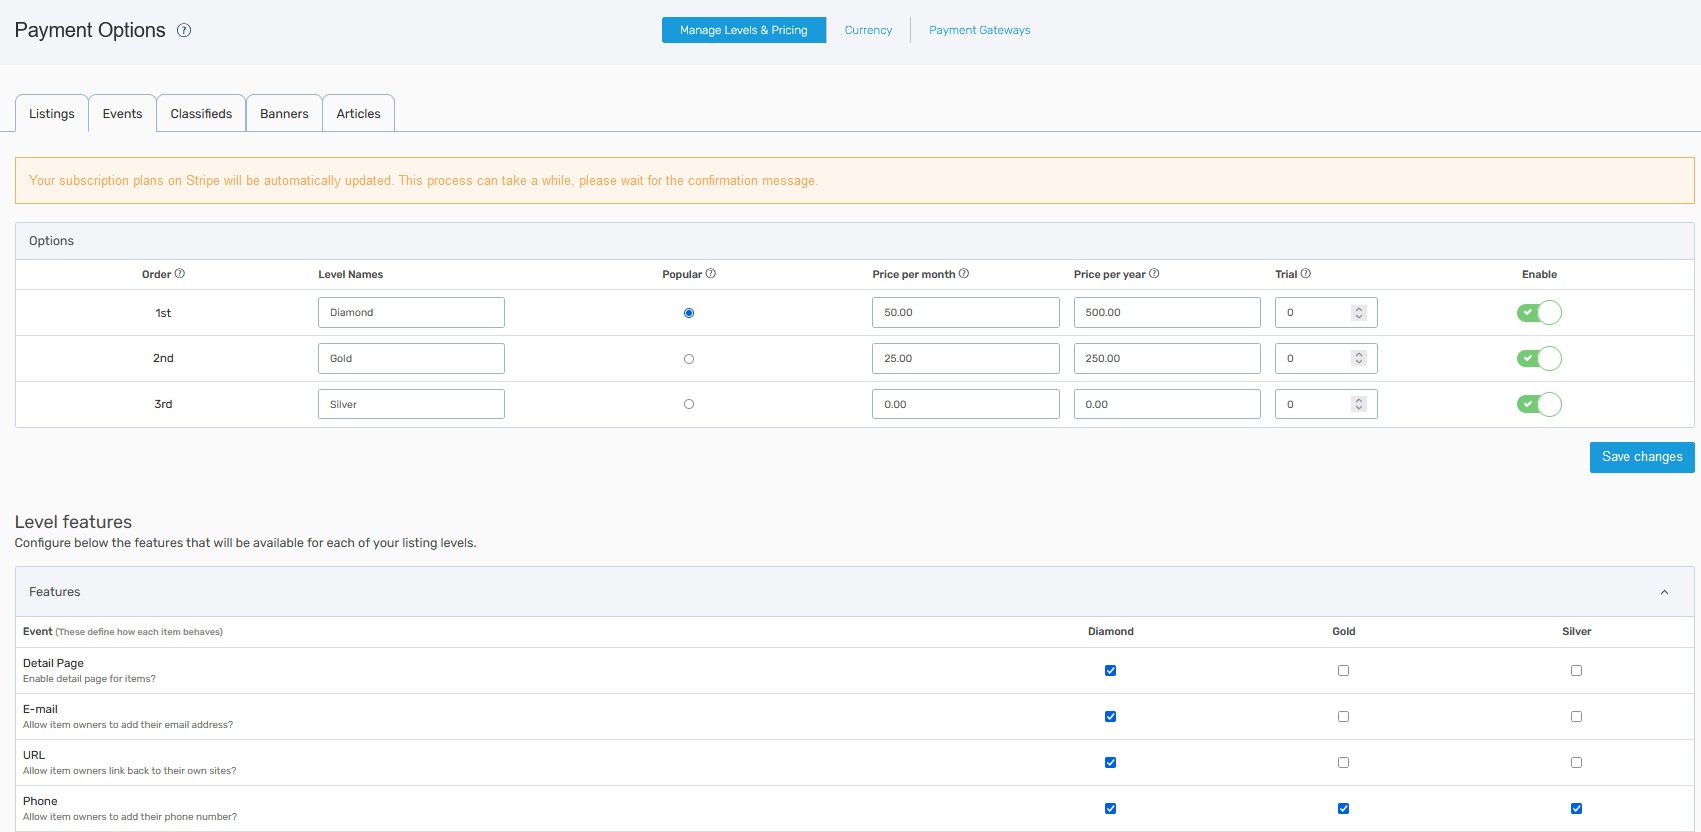
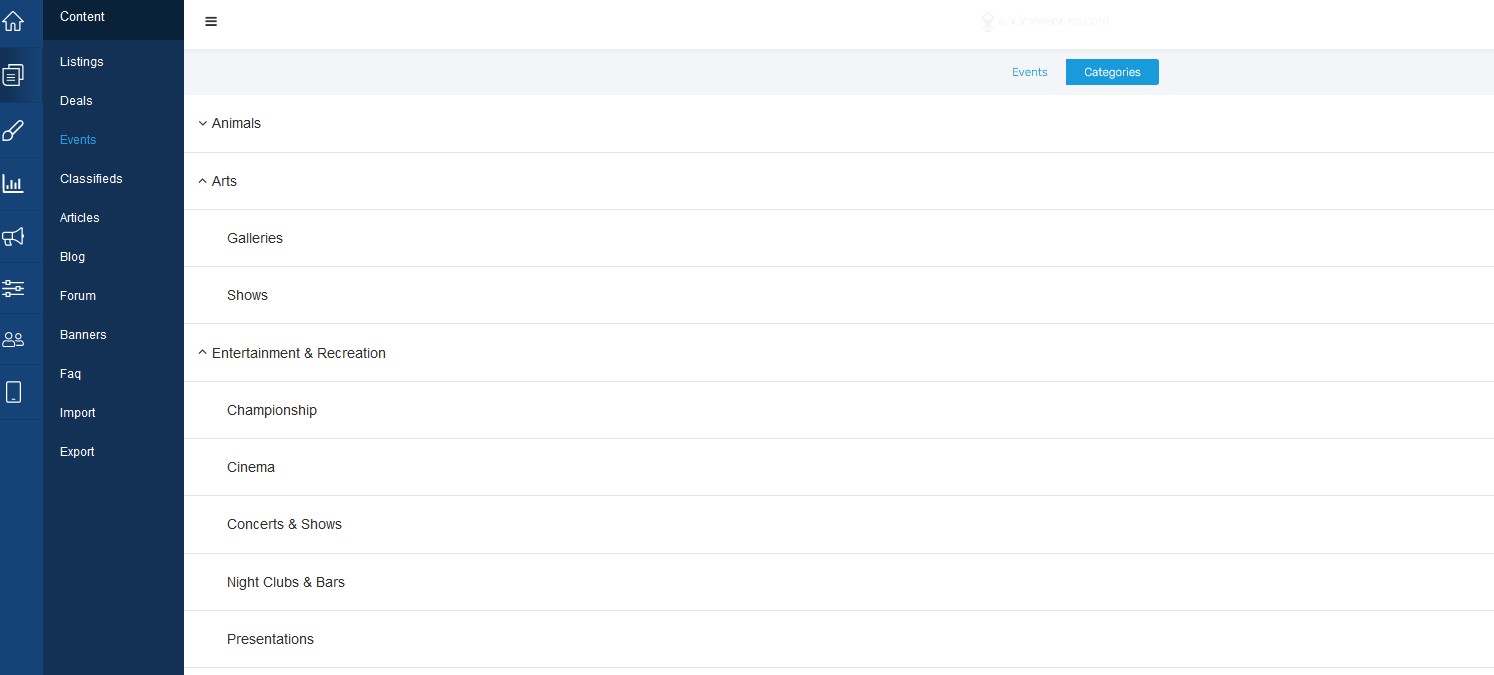
User experience (UX) plays a critical role in the success of any online platform, especially for online directories. When designed with a focus on UX, an online directory can captivate visitors, retain users, and keep sponsors coming back. But what exactly makes for great UX, and how can you use it to elevate your directory?

In this post, we’ll explore the essentials of Experience For Online Directories, guiding you through key principles and practical tools to improve your site’s user experience.

What is User Experience (UX)?

User Experience (UX) goes beyond just a marketing term; it’s a design philosophy that focuses on creating products that are not only functional but also enjoyable to use. It’s about crafting an experience that delights users from start to finish, making your platform both desirable and effective.

When you prioritize UX, you’re not just meeting user expectations; you’re exceeding them, offering a seamless and engaging experience that keeps users coming back. For online directories, this means designing a platform that’s intuitive, easy to navigate, and valuable for both visitors and sponsors.

The Five Main Principles of UX Design

At the heart of every successful user experience are five core principles:

  1. Empathy:
    Always design with the user in mind. What are their goals, frustrations, and needs? By empathizing with users, you can create solutions that genuinely solve their problems.
  2. Strategy:
    A clear UX strategy ensures that every design decision aligns with both user needs and your business goals. A well-thought-out strategy guides users through the platform in a way that achieves desired outcomes like conversions or sign-ups.
  3. Usability:
    Your directory should be easy to navigate, intuitive, and efficient. A user-friendly design ensures that visitors can accomplish their goals without frustration.
  4. Inclusivity:
    Make sure your platform is accessible to everyone. This means considering users with disabilities and ensuring that your site works across a range of devices and environments.
  5. Validation:
    Continuously validate your design choices through user feedback and testing. Ongoing feedback helps you make improvements that enhance the user experience over time.

Webinar: enhancing user experience for online directories

Get to Know Your User Base

Understanding your users is the first step toward building a successful online directory. You have two primary user groups: site visitors and sponsors.

  • Site Visitors: These are the people who come to your directory searching for relevant information, services, or listings. Their experience on your platform should be seamless—easy navigation, relevant content, and intuitive design are key.
  • Sponsors: These are the businesses or individuals who fund your directory by placing ads or promoting their services. Sponsors are just as important as visitors. If they can’t easily post ads, track metrics, or gain value from your platform, they won’t return.

Using Data to Understand Your Users

One of the most effective ways to improve UX is by knowing your users’ behavior. Here’s how you can use data tools to gain insights and make data-driven decisions:

  1. Google Search Console:
    This tool shows you what search terms and queries users are typing into search engines to find your site. This helps you understand what topics or services they are looking for and where your directory is most valuable.
  2. Google Analytics:
    Google Analytics provides a wealth of data, such as pages visited, bounce rates, and session duration. By analyzing this information, you can identify which parts of your site are engaging users and which need improvement.
  3. Internal Search Reports:
    By analyzing what users are searching for within your online directory, you can identify gaps in your content and make sure you’re offering what they truly need. If many users are searching for a specific type of listing that’s hard to find, it may be time to improve your site’s organization.
  4. Heatmap Tools:
    Tools like Hotjar help you visualize how users interact with your pages. They show where users click, scroll, and spend time, offering insight into which elements of your design are working—and which are not.

Once you have your data, it’s time to act. Identify key areas where users are spending the most time, or where they are dropping off. By offering relevant content and improving underperforming areas, you can create a smoother user experience. For example, if a large portion of your audience is searching for a particular service, ensure that the service is easy to find and highlighted in relevant areas.

Content Curation: Polishing What Matters Most

Content is a crucial part of the user experience. It’s not just about having lots of content—it’s about offering the right content. Content curation involves identifying the most relevant information for your users and presenting it in a visually appealing way. For an online directory, this could mean polishing your most popular listings or articles to make them even more attractive and accessible.

Make sure that your best content is easy to find, clear, and engaging. A well-curated site keeps users interested and encourages them to return.

Conclusion

User experience is a vital aspect of building a successful online directory. By understanding your users, leveraging data, and focusing on design, you can create an engaging, intuitive platform that serves both visitors and sponsors. Keep the five principles of UX design in mind as you work to refine your site, and you’ll see the benefits of a user-centered approach.

DOWNLOAD THE MATERIAL DISCUSSED IN THE WEBINAR:

This session was recorded on September 25th, 2024.

Want more tips? Shoot us a note at marketing@eDirectory.com and don’t forget to join our Facebook group.

Join the eDirectory Facebook Group

Webinar: The eDirectory Banner Ads System

The eDirectory Banner Ads System

We hosted an insightful webinar on “The eDirectory Banner Ads System,” exploring how eDirectory owners can utilize this powerful tool to monetize their platforms, attract advertisers, and enhance user experiences. For those who missed it, here’s a quick recap of the key takeaways.

Why Use Banner Ads?

Banner ads have become a go-to strategy for online directories, providing significant benefits for both site owners and advertisers alike. Here’s why they are essential:

  • Additional Revenue Stream: Banner ads offer a straightforward way to generate income. By selling ad space on your directory, you open up a consistent, reliable revenue channel.
  • Targeted Advertising: Ads can be strategically placed to target specific audience segments, enhancing the effectiveness of ad campaigns and boosting satisfaction among advertisers.
  • Increased Site Value: Offering banner ads not only diversifies your monetization methods but also increases the perceived value of your directory, making it more appealing to advertisers seeking visibility.

The eDirectory Banner Ads System

The eDirectory Banner Ads System takes banner ads to the next level, providing flexibility and customization options that can cater to a wide range of business needs. Here’s an overview of its core features:

  • 5 Industry-Standard Banner Types: Choose from standard banner formats that are widely accepted across the industry, allowing for seamless integration with advertisers’ existing assets.
  • Creation by Site Owners and Sponsors: Both site owners and sponsors can easily create and manage their banners directly within the eDirectory system, making it convenient to update or change ads as needed.
  • Flexible Pricing Cycles: The system allows for flexible pricing models, giving directory owners the ability to offer customized ad pricing based on the needs of their advertisers.
  • Compatibility with Script-based Ads Platforms: For those who prefer to run ads via third-party ad networks, eDirectory supports script-based ads, further expanding monetization options.
  • Exclusive Banners for Native Apps: Want to offer premium ad placement? eDirectory provides exclusive banner ad spaces in native mobile apps, ensuring that advertisers can reach your mobile users effectively.

Webinar: Marketing Funnels for Online Directories

Best Practices for Optimizing Banner Ads

To help you maximize the effectiveness of banner ads, we shared some best practices during the webinar:

  • Limit the Number of Ad Slots: Reducing the number of ad slots on each page can create a less cluttered look and make each banner more valuable, driving higher engagement from visitors.
  • Use Canva for Design: We recommend using tools like Canva.com to easily create visually appealing ads, even without professional design skills.
  • Source Great Images: Sites like Unsplash.com offer a wealth of high-quality, royalty-free images that can be used to create eye-catching banners.
  • Offer Premium Levels: Adjusting premium user levels to hide ads can be an added incentive for users to upgrade their accounts, balancing user experience with ad placement.
Geo-targeted Banner Ads Plugin

One of the standout features of the eDirectory system is the Geo-targeted Banner Ads Plugin, which allows directory owners to serve ads based on the user’s location. This plugin enables highly personalized ad experiences, which can significantly improve ad relevance and performance.

  • Target Specific Locations: You can set banners to display within a specific location radius, ensuring that ads are only seen by users within certain geographic areas.
  • Mobile-Optimized: The geo-targeting feature works seamlessly on mobile apps, enabling advertisers to reach users wherever they are.

Monetization Strategies

During the webinar, we also discussed several monetization strategies to help you maximize revenue from banner ads:

  • Determine Pricing for Different Placements: Evaluate the value of different ad placements across your site, offering higher rates for prime locations such as above-the-fold or in high-traffic areas.
  • Promote Your Site with Unsold Banner Space: Don’t let empty ad slots go to waste. Use them to promote internal content, featured listings, or upcoming events.
  • Leverage Analytics: Show the value of your banner ad offerings to potential clients by providing detailed analytics. Advertisers are more likely to invest when they see clear metrics on engagement and visibility.
  • Offer Tiered Ad Packages: Consider offering bundled ad packages or tiered options, catering to both smaller advertisers and those with larger budgets. This could include the “Elephant Hunting” approach, where you target a few high-paying advertisers rather than relying on many small ones.

Conclusion

The eDirectory Banner Ads System offers a robust and flexible platform for directory owners looking to boost their revenue through targeted advertising. By following best practices and implementing geo-targeted ads, you can increase both your ad revenue and the value of your site to advertisers. If you missed the webinar or want more details on how to leverage these features, feel free to reach out to our team for a personalized demo.

DOWNLOAD THE MATERIAL DISCUSSED IN THE WEBINAR:

This session was recorded on September 12th, 2024.

Want more tips? Shoot us a note at marketing@eDirectory.com and don’t forget to join our Facebook group.

Join the eDirectory Facebook Group

Webinar: Marketing Funnels for Online Directories

Marketing Funnel for Online Directories

Yesterday, we hosted an insightful webinar titled “Marketing Funnels for Online Directories,” where we delved deep into this powerful concept, offering actionable strategies to help directory owners drive traffic, convert visitors, and ultimately grow their business.

What is a Marketing Funnel?

At its core, a marketing funnel is a strategic model that maps out the customer journey from the first contact with your project to the final sale. It’s one of the most essential content-marketing concepts, guiding how to move potential customers from awareness to decision-making, ensuring that your online directory not only attracts visitors but also converts them into paying customers.

The Three Stages of the Marketing Funnel

We broke down the marketing funnel into three key stages during the webinar:

  1. Top of Funnel (ToF): Awareness Stage
    • This is where potential customers first learn about your online directory. At this stage, they might not have been aware of your website or its advantages.
  2. Middle of Funnel (MoF): Consideration Stage
    • Here, your audience begins to recognize your website as a potential solution to their needs. They start considering your directory as a viable option.
  3. Bottom of Funnel (BoF): Decision Stage
    • At this final stage, your leads are ready to make a purchase decision. Your goal is to convert these leads into customers.

Each of these stages requires specific content tailored to engage your audience and drive them further down the funnel, from awareness to conversion.

Creating a Marketing Funnel for Your Online Directory

1. Journey Mapping

Understanding your customer’s journey is the first step in optimizing your marketing funnel. If your directory already has a considerable user base, mapping the journey involves gathering insights from your best customers. Ask them about their profile, concerns, ambitions, and reasons for choosing your directory. If you’re just starting out, engage with as many potential customers as possible to uncover the same insights.

2. Content Planning

Once you’ve mapped the customer journey, the next step is content planning. Your content strategy should be meticulously designed to guide your customers through each stage of the funnel. The content needs to evolve from informative and broad at the top of the funnel to more specific and persuasive as you move toward the bottom.

Types of Content for Each Funnel Stage

1. Top-of-Funnel Content

Content at this stage should aim to make your audience aware of how your directory can solve their problems. Ideal topics include:

  • The role of digital marketing in attracting new customers within your niche.
  • Strategies to diversify exposure channels and increase visibility.
  • The difference between a qualified audience and a mass audience in your niche.

2. Middle-of-Funnel Content

In the middle of the funnel, your content should be more informative, presenting your directory as a solution without being overtly promotional. Suggested topics include:

  • The benefits of advertising in a feature-rich directory.
  • How your directory compares favorably to competitors.
  • Success stories from satisfied clients.

3. Bottom-of-Funnel Content

Finally, at the bottom of the funnel, your content should focus on closing the deal. Start with informative materials about your services, such as a media kit, and lead into a compelling offer. Examples of effective content include:

  • A media kit highlighting key metrics like site traffic and social media stats.
  • Testimonials from satisfied clients.
  • A landing page featuring an irresistible offer.

Webinar: Marketing Funnels for Online Directories

Maximizing the Impact of Your Content

Once your content is ready, it’s time to maximize its reach:

  • Share your content across social media platforms.
  • Highlight it on key pages of your directory, such as the advertising and contact pages.
  • Consider investing in paid traffic through Google Ads or social media ads.

Leveraging Organic and Paid Traffic

For organic traffic, use internal links to keep visitors engaged and guide them to the next stage of the funnel. Adding a lead form widget to your blog posts and incorporating a chat feature for instant communication can also enhance engagement.

For paid traffic, utilize segmented audiences to target specific groups of site visitors. This targeted approach ensures that the right content reaches the right audience at the right time, driving conversions and feeding your marketing funnel effectively.

Conclusion

Building a robust marketing funnel is essential for the success of your online directory. By understanding your customers’ journey and tailoring content for each stage of the funnel, you can significantly increase your chances of converting visitors into loyal customers. We hope the strategies shared in our webinar empower you to optimize your marketing efforts and achieve your business goals.

DOWNLOAD THE MATERIAL DISCUSSED IN THE WEBINAR:

This session was recorded on August 28th, 2024.

Want more tips? Shoot us a note at marketing@eDirectory.com and don’t forget to join our Facebook group.

Join the eDirectory Facebook Group

Webinar: How to Create Membership Websites

How to Create a Membership Website

Whether you’re running an association, professional group, or any organization looking to offer a membership model, this webinar provided valuable insights on how to make the most of eDirectory’s powerful features.

What is a Membership Directory?

A membership directory is an online, searchable platform that showcases detailed information about the members of an organization, association, or group. It serves as a digital hub where members can promote their businesses and services, offering a seal of approval and credibility to their offerings. This directory is not just a list; it’s a resource that helps identify specific expertise within the group, making it easier for members to connect, collaborate, and communicate. In essence, a membership directory is a powerful tool for networking and fostering community among members.

Benefits of a Member Directory

A well-crafted membership directory offers numerous benefits to both the organization and its members:

  • Recurring Revenue Stream: By managing membership fees through the directory, organizations can generate a steady income, which is crucial for sustaining operations and growth.
  • Improved Retention and Loyalty: Members are more likely to stay engaged and loyal when they see value in their membership, facilitated by features like exclusive access to content and perks.
  • Marketing & Lead Generation: The membership directory can serve as a powerful marketing tool, driving leads not only for the organization but also for its members.
  • Professional Networking: It’s a platform for members to network, collaborate, and develop professionally, which can increase the overall value of membership.
  • Access Control: Organizations can offer exclusive content and perks to members, creating a sense of value and exclusivity.
  • Brand Loyalty and Advocacy: By fostering a sense of community and providing value, the directory helps build brand loyalty and advocacy among members.
  • Flexibility and Customization: eDirectory’s features allow for significant customization, ensuring the directory meets the unique needs of the organization.

Webinar: how to create membership websites

Monetizing a Member Directory

Monetization is a crucial aspect of any membership directory, and eDirectory provides multiple avenues to generate revenue both within and outside the platform:

Within eDirectory:

  • Membership Dues: Collect recurring membership dues by setting up listing subscriptions.
  • Selling Articles, Events, Banners: Offer additional services like article submissions, event listings, and banner ads to generate extra revenue.
  • Tailored Packages: Create customized packages for different membership levels or special offers.
  • Gated/Paywalled Content: Restrict access to premium content, making it available only to paying members.

Outside eDirectory:

  • Sponsored Newsletter: Generate revenue by offering sponsored content in newsletters sent to members.
  • Social Media Management: Provide social media management services to members, enhancing their online presence.
  • Marketing Services: Offer additional marketing services to help members promote their businesses.
  • Google Adsense and Other Ad Networks: Monetize the directory with ad placements from networks like Google Adsense.

How eDirectory Helps You

The latest version of eDirectory offers several features to streamline the creation and management of membership directories:

  • Tiered Listings and Events: Easily create different membership levels with varying access to listings and events.
  • Paywalled/Gated Settings: Implement paywalls to restrict access to premium content, ensuring that only paying members can access certain areas.
  • Different Payment Cycles: Flexibly manage membership dues with options for different payment cycles, accommodating monthly, quarterly, or annual subscriptions.
  • Automated Billing System: eDirectory’s automated billing system simplifies the process of collecting dues, freeing up time to focus on other aspects of your organization.
  • Flexible Page Editor: Customize your directory with a flexible page editor that allows you to tailor the design and functionality to meet your organization’s specific needs.

Conclusion

Creating a successful membership website requires the right tools and strategies. With eDirectory’s latest features, organizations can build, manage, and monetize their membership directories more effectively than ever before. Whether you’re looking to boost revenue, improve member engagement, or provide valuable resources to your community, eDirectory offers the flexibility and power to make it happen.


DOWNLOAD THE MATERIAL DISCUSSED IN THE WEBINAR:

This session was recorded on August 14th, 2024.

Want more tips? Shoot us a note at marketing@eDirectory.com and don’t forget to join our Facebook group.

Join the eDirectory Facebook Group

Webinar: Master the New Package Builder

The New eDirectory Package Builder

In yesterday’s webinar on eDirectory’s new Package Builder, we covered an array of updates and features designed to entrust users to create more compelling, value-driven packages for their members. Here’s a summary of what was discussed, focusing on recent updates, the benefits of bundling, and how to get started with these new tools.

Recent Updates to eDirectory

1. Ability to Restrict Content to Paying Members: One of the most significant updates is the ability to gate content exclusively for paying members. This paywall feature allows you to create premium content areas, incentivizing more users to subscribe and enjoy exclusive benefits.

2. Levels & Pricing is now Products & Plans: The rebranding of ‘Levels & Pricing’ to ‘Products & Plans’ reflects a more flexible approach to managing what you offer. You can now create varied packages that cater to different audience needs and business models.

3. Create Packages with Listings, Classifieds, and Events: You can now bundle specific numbers of listings, classifieds, and events into customizable packages. This granularity ensures you can offer exactly what your members need, whether they’re looking for a single listing or a comprehensive promotional package.

4. Unlimited Plans and Options: The introduction of unlimited plans means you can now offer limitless options to your clients, adding significant value and appeal to your packages.

Webinar: Master the New Package Builder

5. 5 New Billing Cycles In addition to the existing monthly and yearly cycles, we’ve added five new billing cycles: weekly, bi-weekly, quarterly, semi-annual, and one-time payments. This flexibility helps accommodate the varied financial preferences of your members.

6. New Widgets for the Advertise Page Our new widgets make it easier to showcase your advertising options, enhancing the visual appeal and functionality of your Advertise page.

Why Bundling is Important?

Increase the Value of the Average Sale Bundling multiple products or services together increases the perceived value, often leading to higher average sales. Members are more likely to purchase a comprehensive package than individual items.

Simplify Decision-Making and Checkout Process By offering bundled packages, you simplify the decision-making process for your customers. They can easily see what’s included and understand the benefits, leading to a smoother checkout experience.

Pro-tip: Bundle Outside Products & Services Remember, you can also bundle products and services that are outside of eDirectory into your packages. This flexibility allows you to offer even more value and cater to a wider range of member needs.

Getting Started

Activating the Paywall Feature Begin by activating the paywall feature. This will enable you to restrict access to premium content, making it available only to paying members.

Configuring Gated/Paywalled Products Next, configure which products will be gated. Decide what content or services will be exclusive to your paying members and set up your paywall accordingly.

Adding Gated Access to Sponsors You can also offer gated access to sponsors. This feature allows sponsors to have exclusive access to certain content or tools, adding another layer of value to your offerings.

Creating a Member Access Plan Finally, create a member access plan that clearly outlines what your members will receive. This could include exclusive listings, events, classifieds, or other premium content.

Conclusion

Remember, products are not publicly available until you create a plan for them and display them using any of the pricing widgets. This allows you to create “hidden” products/plans or use them for different purposes, such as a “Setup Fee.”

Mastering the combination of listing templates, product features, paywall, and packages can significantly enhance your sales strategy and results. With these powerful tools, you can offer more tailored, appealing packages to your members, ultimately driving more sales and increasing member satisfaction.

Thank you to everyone who attended the webinar! We hope you found it informative and are excited to start using the new Package Builder features. Stay tuned for more updates and future webinars to help you make the most of eDirectory.

DOWNLOAD THE MATERIAL DISCUSSED IN THE WEBINAR:

This session was recorded on Jul 31th, 2024.

Want more tips? Shoot us a note at marketing@eDirectory.com and don’t forget to join our Facebook group.

Join the eDirectory Facebook Group

Webinar: Meet the New eDirectory Version 13.5

Meet the New eDirectory v13.5!

Yesterday, we hosted an exciting webinar to introduce eDirectory 13.5, and it was packed with insights about the latest features and improvements. Whether you missed the webinar or want a quick refresher, here’s a summary of everything we covered.

What’s New in eDirectory 13.5?

Ideal Solution for Membership Sites

eDirectory 13.5 is designed to be the perfect solution for membership sites. With new features and enhancements, managing memberships and content has never been easier.

Levels and Plans are Now Products & Plans

One of the significant changes in this version is the rebranding of the Levels and Plans feature to Products & Plans. This new naming convention better reflects the versatility and functionality of the offerings.

More Billing Cycles

eDirectory 13.5 introduces additional billing cycles, providing greater flexibility in managing subscriptions and payments. Whether you prefer monthly, quarterly, semiannual, or annual billing, you now have more options to choose from.

Bundling Options

Another exciting feature is the introduction of bundling options. You can now create bundles of products and services, offering your members more value and increasing your revenue potential.

Gated Content (Paywall)

To enhance the value of your content, eDirectory 13.5 includes gated content functionality. This paywall feature allows you to restrict access to premium content, ensuring that only paying members can view it.

Member Restricted Content & Paywall

With the new member-restricted content feature, you can now gate your content effectively. This means that only members who have paid their membership fees can access premium articles, videos, and other valuable resources. This feature not only helps you monetize your content but also ensures that your members receive exclusive access to high-quality material.

Products & Plans

The revamped Products & Plans feature is a game-changer for managing listings, classifieds, and events. Here’s a breakdown of what you can expect:

  • Up to 10 Products for Listings, Classifieds, and Events: You can now offer up to 10 distinct products, giving your members more choices and enhancing their experience on your platform.
  • Unlimited Plans: There are no limits to the number of plans you can create, allowing you to tailor your offerings to meet the diverse needs of your audience.
  • New Billing Cycles: With the introduction of new billing cycles, you have greater flexibility in setting up payment schedules that work best for you and your members.
  • Bundling Options: The ability to bundle products and services adds significant value for your members and opens up new revenue streams for your business.

WEBINAR: Meet the New eDirectory Version 13.5

Conclusion

eDirectory 13.5 is packed with powerful features that make it the ideal platform for membership sites. From the enhanced Products & Plans to the new billing cycles and bundling options, there are plenty of ways to improve member experience and increase your revenue. The introduction of gated content and paywalls ensures that your valuable content is protected and monetized effectively.

DOWNLOAD THE MATERIAL DISCUSSED IN THE WEBINAR:

This session was recorded on Jul 17th, 2024.

Want more tips? Shoot us a note at marketing@eDirectory.com and don’t forget to join our Facebook group.

Join the eDirectory Facebook Group

Meet the New eDirectory v13.5!

Meet the New eDirectory v13.5!

We are excited to announce the release of eDirectory v13.5, a major update packed with new features and game-changing membership options for our clients. This version brings significant improvements to our platform, making it more versatile and user-friendly. Let’s dive into the details of what’s new and what’s changed in this release.

What’s New

Combination of Modules and Levels Now Called Products

In this update, we’ve redefined the combination of modules (listings, events, classifieds, banners, and articles) and levels as “Products.” This change simplifies the way site owners can manage and offer these elements to their users, providing a more cohesive and streamlined experience.

Manage Levels & Pricing Updated to Products & Plans

The Admin section for managing levels and pricing has been fully revamped and is now called Products & Plans. This update includes:

Manage Products


  • Customizable Product Types: Site owners can create up to 10 types of products for listings, events, and classifieds.
  • Paywalled Content: Products can be defined to be available exclusively for subscribed members, enabling paywalled content.

Manage Plans


  • Unlimited Plan Creation: Site owners can create unlimited plans to advertise products on the website.
  • Free Trials: Plans can include a free trial option (available for Stripe only).
  • Flexible Pricing Models: Site owners can define up to two pricing models per plan with several renewal cycles, including weekly, biweekly, monthly, quarterly, semiannual, annual, and one-time payment.
  • Product Combinations: Plans can offer different combinations of products, including unlimited products and specific listing templates per plan.
  • Access to Paywalled Content: Plans can grant access to paywalled content.

Additional Settings & Payment Gateways

  • Simplified Interface: The interface for managing additional settings related to payment gateways, currency, tax, and more has been simplified.
  • Paywall Functionality: The paywall functionality can be enabled on the website.

Paywalled Blog Posts

Blog posts can now be set as paywalled individually when the Paywall feature is enabled, providing more flexibility in content monetization.

Promotion Codes for Specific Plans

Promotion codes can be created and made available for specific plans, offering more targeted promotional opportunities.

New Subscriptions Page

A new page called Subscriptions has been added under the Revenue Reports section, allowing site owners to manage subscribed members more effectively.

Redesigned Checkout Process

The checkout process has been completely redesigned and simplified into three steps: user identification, checkout form, and payment confirmation. Each step’s pages are available in the Page Editor for full customization.

Updated Email Notifications

Email notifications have been updated to reflect the new approach to subscriptions and plans. Renewal reminder emails now work with subscriptions instead of individual listings, and a new notification for member sign-ups has been included.

Enhanced Modules Preview

The modules preview on the site manager has been updated:

  • Status Change: The pop-up for changing status has been replaced by a dropdown, simplifying the process.
  • Plan and Category Listing: The plan assigned to the product and its categories are now listed.

Customizable Renewal Dates

The renewal date for products is inherited from the subscription to which they are assigned, but site owners can customize it individually if needed.

Activate Products Without Subscription

Site owners can now activate products and define a renewal date even if they are not assigned to a subscription.

New Widgets for Promoting Plans

Five new widgets have been added to the Page Editor to help promote plans:

  • Single Plan Card
  • Pricing & Plans Cards
  • Pricing & Plans Cards with Custom Description
  • Pricing & Plans Cards with Topics (Type 1)
  • Pricing & Plans Cards with Topics (Type 2)

Simplified Sponsor and Profile Sections

The Sponsors and Profile sections have been consolidated into a single section called Members. This change simplifies the user experience and streamlines site management.

Updated Members Dashboard

The Members dashboard has been updated with a new user flow for signing up for plans, managing subscriptions, and adding content, enhancing the overall user experience.

eDirectory Facebook Group

What’s Changed

Plan-Based Product Charging

Site owners will no longer be able to charge for individual products. Instead, a plan should be created offering the product or a combination of products.

Popular Plans Configuration

Popular plans, previously known as levels, are now configured on a per-widget basis in the Page Editor, providing more customization options.

Category Pricing

Site owners will no longer be able to define prices for additional categories for listings. All listings can now have up to 20 categories without additional pricing.

Listing Template Pricing

Differentiated pricing for listing templates is no longer available, simplifying the pricing structure.

Discontinued Payment Gateways

Payments with 2CheckOut and PayFlow Link are no longer supported in this version.

Updated Approval Requirements

The approval requirements options in the General Settings section have been updated with new options to control how the status of products will be updated according to the subscription they belong to.

Simplified Email Configuration

The interface for configuring Administrator Email under the Email Sending configuration section has been simplified for easier management.

Removal of Feature Packages

Feature Packages, previously available under the Promotions & Packages section, are no longer available.

Removed Email Notifications

The following email notifications have been removed to streamline communication:

  • Visitor Account Create (site manager area)
  • Visitor Account Update
  • Account Activation
  • Listing Signup
  • Event Signup
  • Banner Signup
  • Classified Signup
  • Article Signup

Promotional Codes for Plans Only

Promotional codes are now applicable only to plan subscriptions and not individual products, aligning with the new subscription model.

Ready to start?

We believe these changes will greatly enhance the functionality and usability of eDirectory for both site owners and their members. Ready to experience the new eDirectory v13.5? Get a free guided demo at www.edirectory.com. Current customers, upgrade now to unlock exciting new features!

Read the changelog in full

Request your upgrade: https://www.edirectory.com/upgrade-form.php

Edirectory Free guided demo


Webinar: The eDirectory Apps

The eDirectory Apps

The suite of eDirectory apps became even more powerful. The new App was built using a Google technology named Flutter which delivers improved performance and visual consistency on different platforms.

The new technology was combined with a new design to make the eDirectory App look fresh and current. It took the eDirectory team months of research and prototyping to get to the final product: an app that’s fast and looks great on any device.

In this webinar, he will describe in detail the eDirectory App’s main features, to help you understand what it can do for your business.

These are the main new features of the eDirectory app:

  • Listing template design
  • Exclusive content
  • Stories
  • Deals
  • Banners
  • Custom home screens
  • Sliders
  • Inbox messages
  • Apple ID login

The eDirectory Native Apps

Useful links and tools mentioned in the webinar:

*We are not affiliated, associated, authorized, endorsed by, or in any way officially connected to the tools and sites mentioned in the webinar.

This session was recorded on June 27th, 2024.

Want more tips? Shoot us a note at .

Edirectory Free guided demo

How to Build a Membership Website Easily With eDirectory

how to build a membership website with edirectoryhow to build a membership website

The demand for building membership websites is increasing due to their potential for recurring revenue, leading to their widespread popularity in several different niches. It’s possible to create and monetize membership websites for online education purposes, discount clubs, gaming, members only forums, workshops and more.

By definition, a membership website is an online business that provides exclusive content, services, or resources to members in return for a paid membership. These websites can cater to individuals or organizations and serve various purposes such as education or community building.

Running a successful membership site takes work, but luckily, there are some great tools out there to help you along the way (and give you access to amazing features you can use to grow your business online).

So in this article, we’ll show you exactly what a membership website is, what it does, and how you can build one (no advanced technical skills required).

Ready to explore this ultimate guide to membership websites? Let’s jump in.

What Is a Membership Website?

A membership website is a platform that offers exclusive content to members only. Usually, that content exists on the other end of a paywall.

Simply put, in exchange for signing up for the site, members can access gated content that’s not available elsewhere. Only members can access and use the information you put “behind” your membership sign-up.

Pricing for a membership site can be free, paid, or tiered. Most notably, a membership website takes advantage of the booming subscription-based model of recurring revenue.

Meaning, site owners can expect to see repeated income. Which is extra enticing since 76% of businesses now look at subscription-based pricing as a way to improve their customer relationships and retention.

how to build a membership website

Sure, numbers like this are super exciting if you’re just starting to learn how to build a membership site. However, it’s important to point out that building this kind of website is no small task. Business owners who make money online through a successful membership site put a ton of work into it.

So, let’s see how people end up making money with a successful membership site next.

How Membership Sites Make Money

It’s likely you’ve heard about people making good money from running a membership website. And you may be thinking that income is just from repeating monthly or annual fees. In reality, many successful membership sites make money using a mix of different methods.

So now you’re probably wondering…ok then, exactly how do membership sites make money?

Well, here are the main ways membership sites can earn money:

  • Membership Dues: Get recurring revenue month after month (or year after year) when people pay you to be a member of your site. This can be set up in tiers so the highest-priced plan should also include the most perks for your members.
  • Affiliate Sales: Collect revenue from sales you send to your affiliates. Insert affiliate links to partner products within your website content.
  • Paywalled Content: Paywalled content refers to restricted content accessible only to paying users. Paywalls are features on websites, apps, or digital libraries that restrict access to content unless a payment is made or a subscription is purchased. More on this later!
  • Selling Digital Products: Courses, guides, and other downloadable content that’s valuable to others can be sold on your website. You can set up an eCommerce shop or bundle these products with specific membership plans.
  • Selling Directory Listings: If you’re using a robust membership tool, you’ll have access to other revenue-generating features like online directories and classifieds. Selling these listings to advertisers and sponsors can be a fantastic way to generate income.

As you can see, there’s more than one way to make money using a membership site. And using a solid membership tool that offers features that support these revenue streams makes it much easier to tap into these different ways to generate income from your website.

WordPress Plugin vs Dedicated Membership Platform

When you’re learning how to build a membership site, you’ll see there are WordPress membership plugins that developers install and use to give normal website membership capabilities.

Some people look up how to build a membership website with WordPress and dive right in, trying to do everything at once and all by themselves. This could cost months of time setting up a DIY website and configuring a WordPress plugin. After it’s up and running, many people realize they simply don’t have the time or energy it takes to continue to build every feature their membership site needs.

For the average business owner, installing, setting up, and maintaining a made-from-scratch website plus a membership plugin can be very time-consuming and not beginner-friendly.

For those who plan their membership site, use a dedicated membership site tool like eDirectory, and stay committed, the possibilities for growth can be remarkable. This dedicated membership site platform offers everything you need to launch and grow a successful membership and online directory website with members-only access, banner advertisements, online recurring payments, and more.

If you’re serious about setting up a successful membership site and looking for a one-stop solution, a dedicated membership tool is the way to go.

So now that you know why people prefer dedicated membership tools over DIY solutions like WordPress membership plugins, let’s cover exactly how to build a membership website.

Members Only Deals

How to Build a Membership Website

When you’re ready to make your own membership website, follow these easy steps to get it up and running in no time.

1. Determine Your niche

When you’re first learning how to create a membership program, it can feel overwhelming. Luckily, this step is not only fun, but it will also help clear a path for where your website is headed.

The very first thing you’ll want to do to build a membership website is to pick your niche.

You may already have an online presence that you want to monetize, like a blog or podcast. In that case, you’ve already carved out your niche.

If not, some great membership website ideas can include (but are not limited to):

  • Niche online business directories.
  • Specialized gated content like stock photos, how-to’s, recipes, etc.
  • Local classified listings.
  • Event calendars for specific interests and groups.
  • Savings clubs (deals & offers).
  • Chambers of Commerce.
  • Churches and parishes communities.
  • Pet-friendly guides.
  • Children and Parents Association.
  • Courses and educational content.
  • Video on demand.

…and a lot more.

So, what do you know a lot about? What are you passionate about? The answers to these questions can help inspire ideas for your membership website.

Start Your Online Directory2. Choose the Right Membership Tool

Next up, you’ll want to sign up for eDirectory. Using a dedicated membership tool is the best way to easily build and manage your website (plus access features that let you generate additional income.)

eDirectory offers features tailored to membership websites where you, as the site owner, can offer advantages for your listing sponsors

And unlike a WordPress membership site, eDirectory is a cloud solution that provides everything you need to build a raving online community (and without all the hassle).

After you’ve got your membership tool up and running, you’ll want to set up your payment gateways.

3. Set Up Payment Methods

Accepting secure credit card and PayPal payments over your website is a must for a successful membership site. Plus, you need a way to get paid.

So, the next step to setting up your membership website is to configure your payment methods. You’ll have many payment service provider options to choose from.

If you don’t already have one, you’ll need to set up an account with your preferred payment solution. Then, you can connect your account through your membership website.

Head to Settings > Products & Plans > Additional settings & payment gateways

eDirectory Payment Gateways


Once you’ve connected your payment provider(s) details, you’ll be ready to set up and customize each membership level you offer.

4. Build Your Membership Levels

The next thing you need to do is determine the cost and features of each one of your membership levels.

Not sure what to charge? We recommended starting with a free membership level with some features included. Free members get to use your software and are a great place to find paying customers since they’re already familiar with your brand and software.

After your free level is set up, you’ll need to decide what you’ll include with each one of your paid membership levels.

You can offer different features within:

  • Listings
  • Events
  • Classifieds
  • Banners
  • Articles


eDirectory Product Mgmt

Just remember to save the most impactful features for your highest plan so people will want to sign up.

Now it’s time to bundle your products in a killer offer, for example: combining 1 top-tier-level listing plus banners and classifieds, or just one simple listing combined with access to paywalled content. Combine and create plans any way you want, also, with different paying options such as weekly, monthly, semiannual, annual, and one-time payment, a very requested feature from our user base that’s very useful for Events, for example.


eDirectory Plans

To display all these options to your sponsors with ease eDirectory comes with new widgets specifically designed to showcase the options created in the site manager. This is excellent to drive users through the advertise with us page and increase your chances of conversion.

Cards widget Plans

Setup your Paywall

As mentioned above, paywalled content serves as a strategic tool for boosting membership websites by offering exclusive, high-quality material that is accessible only to paying subscribers. This model can effectively attract users by creating a perception of value and exclusivity around the content. To attract potential members, websites often provide teasers or previews of the paywalled content, showcasing the depth and quality of the material they can expect.

Additionally, leveraging social proof, such as testimonials from existing members and highlighting the benefits of the subscription, can further enhance the appeal. Offering limited-time discounts or trial periods can also be an effective strategy to convert curious visitors into committed subscribers.

To access the paywall feature, first head to the Products & Plans options under the settings menu. There, remember to set up your products first, selecting the levels and features contained in each plan. Later, go to the next section Products & Plans, Plans where you will have access to all the products you’ve created so far.

Paywall toggle

To create a plan, click on the edit button and put together a bundle that includes listings, banners, articles, classifieds, and events. You can easily activate or deactivate the paywall by toggling the switch. When activated, only members will be able to view the content, encouraging visitors to sign up on your online directory website.

This is how it will appear to users when an article, deal, offer, or listing is posted on your membership website:

Paywall Content Front

5. Populate Your Listings

Now that your membership plans are built, it’s time to populate your directory listings. This is an important step because you’ll want to show leads what they can expect when they sign up as a member with you. That’s nearly impossible to do if you can’t visually explain it.

So, you’ll need to create some listings, by hand or by importing them.

During this step, you’ll want to customize your listing layout to match your membership website. There are many configuration options, so pick the one you like the most and keep populating your listings.

6. Create Members-Only Content 

The next step to build a membership website is to create members-only content. The psychological phenomenon known as FOMO (Fear Of Missing Out) can really drive sales, so locking gated content behind a paywall can be a great business decision.

This can look different for everyone since no one membership website is the same.

You may be an expert at succulent care and have tons of helpful guides already published. Compiling this content into an organized course or workbook is a great way to source members-only content for your website.

Image-LandingPage-Membership

If you don’t already have a blog, or if it aligns better with your business model, these are some popular ways to create some members-only content:

  • Business Directory: From local business directories to niche hobbyist groups, people are willing to pay to access listings specific to what they’re interested in. 
  • Classified Ads: If you’re using classifieds on your site, only letting paid members post ads is a great way to earn new recurring subscriptions. Just make sure to populate your ads just like you’ve populated your listings in the previous step.
  • Event Calendar: Only allow members to post to a public event calendar. Alternatively, set it up so only members can view the events.
  • Offer Services: Access to coaching calls, pre-recorded webinars, or courses.
  • Offer Goods: Creatives can give members access to things like custom social media graphic templates or stylized stock images.

…and anything else you can think of that may have value to someone. But to start, these are excellent sources of members-only content you can create quickly and easily.

7. Promote Your Membership Site

Next, you need to promote and market your membership website.

This is an extremely important step because, after all that hard work, you want to make sure people are coming to your website.

Head to the Blog Module in eDirectory and start writing posts around keywords related to your membership website and your intended audience. Find out your ideal customer, what they need, and how they search for it.

how to build a membership website

The easy-to-use and SEO-optimized Blog Module lets you create, monitor, and optimize your content in just a few clicks.

And if you’re planning on making money through affiliate sales, you’ll also find an option to seamlessly insert your links within your content.

On top of SEO blogging, you might also want to consider these popular website promotion methods:

  • Pay-per-Click Advertising (PPC): Pay for Google Ads advertising on specific, related keywords.
  • Take Advantage of Social: Create (and stick to) a social media posting schedule.
  • Email Marketing: Build an email list by collecting addresses on your site then promoting to those leads (great for returning traffic and high conversions).
  • Word of Mouth: In this digital world, website owners often forget how impactful telling other people about your membership site can be. This is especially important for online communities that are locally based, like a business directory.

There are a lot of ways to promote your membership site, but these are all very popular places to start. For more, make sure to head over to our article on how to market an online directory where we’ve laid out some detailed tips for powerful website promotion.

8. Keep Improving Your Membership Site

For any business to succeed, you’ll need to make sure to continually improve. If you notice something isn’t working right on your site, jump in and fix it. If you get feedback from an advertiser about a feature request, see if you can provide it. Make the customer experience pleasant and you’ll likely see members who stay subscribed for the long haul.

how to build a membership website

The great thing about easy-to-use membership website platforms is that whenever you see an area for improvement, you can jump right into your site and change it. And if you’re not sure how, reach out to us for help.

With eDirectory, you get access to a helpful support team ready to help you make your membership website a success.

Create a Membership Site with eDirectory 

Now that you know how to build a membership website, your next step is to launch yours using eDirectory. This feature-rich tool lets you build and manage a customized membership directory to meet your business goals and drive growth.

With eDirectory, your membership site can:

    • Collect Member Dues: Generate recurring revenue from membership fees.
    • Let Members Login: Display an easy-to-use login area for your members to access and manage their own account information.
    • Sell Listings: Allow people and/or businesses to create listings, and automatically turn them into member profiles.
    • Featured Listings: Sell featured directory spots with a repeating revenue model.
    • Integrate with Social Media: Display your Twitter feed on your website, plus encourage members to share your brand across popular social platforms.
    • Use Classified Ads: Offer your members different capabilities inside of classified listings based on membership levels, driving sales to your higher plans.
    • Social Media Integration: Connect with social media platforms for more exposure with social sharing links and a website Twitter feed.
    • Grow with Content: Access the Blog Module to create and manage SEO-optimized content that brings you the right kind of traffic.
    • Earn Money from Ads: Easily Insert Google Ads into banner space on your site or even sell the space to members with a powerful Banner Ad System.
    • List Events: Encourage a sense of community among members by letting them create recurring or one-time event listings, complete with a Google Maps integration.
      …and more.

So if you want to build a successful membership website that’s easy to manage and gives you access to the power of online directories, eDirectory is a fantastic choice.

Asking yourself how can you create a membership website for free? Don’t wait, sign up for a free eDirectory demo today.

Join the eDirectory Facebook Group


Webinar: How to Pitch your Online Directory

How to Pitch your Online Directory

In today’s digital landscape, building and monetizing directory-based websites can be highly lucrative. At eDirectory, we provide a SaaS platform to create such sites, complete with listings and classifieds. However, attracting sponsors to your directory is crucial for generating revenue. Here’s a detailed guide on how to pitch your online directory effectively.

1. The Sales Process

Understanding the sales process is the foundation of a successful pitch. The typical process involves several stages:

Awareness: First, make potential sponsors aware of your directory. This can be achieved through advertising, social media, and content marketing.

Engagement: Once aware, engage potential sponsors by showcasing the value and benefits of being listed in your directory. Use targeted communication and personalized content to pique their interest.

Client: Convert engaged prospects into clients by offering attractive listing options, including free and paid plans.

Advocate: Finally, turn satisfied clients into advocates who can provide testimonials and refer other businesses to your directory.

2. Thinking About Your Pitch – What Are You Trying to Achieve?

Your pitch will likely involve a multi-step process. Here’s how you can structure it:

  • Free Listing: Start by offering a free listing to attract sponsors. This lowers the entry barrier and allows them to experience the benefits of your directory.
  • Engagement with Visitors & Featured Content: Once listed, encourage sponsors to engage with visitors through featured content and special promotions. Highlight success stories and data on visitor interactions.
  • Upgrade to Paid Plan: Finally, present the advantages of upgrading to a paid plan, such as increased visibility, enhanced features, and premium support.

3. Identify Your Pitch Targets

Tailoring your pitch to the right audience is crucial. Here are some customer personas to consider:

  • Large Corporate: Emphasize wide reach and brand exposure.
  • Franchisee: Highlight localized visibility and community engagement.
  • Small Business: Focus on affordability and targeted marketing.
  • Individual Practitioner: Offer personal branding and niche market access.
  • Technical Audience or Marketing Manager: Showcase advanced features, analytics, and ROI potential.

4. How Do You Get Through?

Selecting the right communication channel is key. Consider a mix of the following:

  • Calling: Direct and personal, ideal for establishing initial contact.
  • Email: Suitable for detailed information and follow-ups.
  • SMS Text or WhatsApp Messaging: Quick and convenient, good for reminders and updates.
  • Social Media Messaging: Effective for connecting with modern, tech-savvy businesses.
  • Events: Network and pitch at industry-specific events and conferences.
  • In-Person Visits: Build strong relationships with local businesses.

Webinar: How to Pitch your Online Directory

5. Understand the Value You Are Providing

Clearly communicate the benefits sponsors will receive:

  • Responding to Reviews: Enable sponsors to engage with customer feedback.
  • Seal of Approval: Offer badges or “Best of” lists to enhance credibility.
  • Visibility and Credibility: Assured increased online visibility and strengthened market position.

6. Remember to Use Testimonials

Anecdotal customer stories can make your message resonate more deeply. Collect and showcase testimonials from satisfied clients to build trust and credibility.

7. Write Your Pitch, Customized for Personas and Channels

Create a tailored pitch for each persona and communication channel:

  • Build their listing as part of the sales process. Include a link for them to claim their listing within the pitch.

8. Specific Sales Pitch Tactics

Go beyond the generic “be part of our directory” message. Here are some specific tactics:

  • Offer exclusive insights: Provide data and trends relevant to their industry.
  • Demonstrate ROI: Show potential returns and benefits through case studies.
  • Highlight unique features: Emphasize features like advanced analytics, customizable listings, and premium support.

9. Access to See and Respond to Reviews

Allow sponsors to monitor and respond to customer reviews. This feature can help them improve their service and build a positive online reputation.

10. Time-Based Industry Category Report / Survey

Conduct and share industry-specific reports. For example, a “2024 Report on Florida Fishing Charters Daily Rates and Packages” can attract sponsors by providing valuable insights.

11. Sign Up to Receive Business Tips

Offer subscriptions to newsletters featuring:

  • Industry-specific tips: Provide actionable advice tailored to their market.
  • Marketing tips: Share strategies for handling negative reviews and improving online presence.
  • Resource packages: Include templates, guides, and other resources to aid their business growth.

Conclusion: Refine Your Pitch & Be Persistent

Crafting the perfect pitch takes time and effort. Continuously refine your approach based on feedback and results. Persistence is key – keep engaging potential sponsors and adjusting your strategy to achieve success.

By following these guidelines, you can effectively pitch your online directory and attract valuable sponsors, ensuring the growth and profitability of your business.

Download the material discussed in the webinar:

This session was recorded on Jun 12th, 2024.

Want more tips? Shoot us a note at marketing@eDirectory.com and don’t forget to join our Facebook group.

Join the eDirectory Facebook Group